Snow-Capped Red Velvet Sugar Cookies Recipe
Introduction
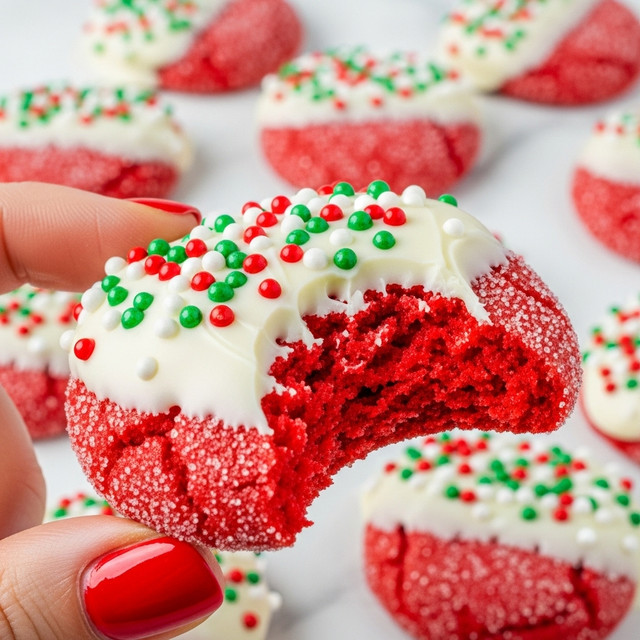
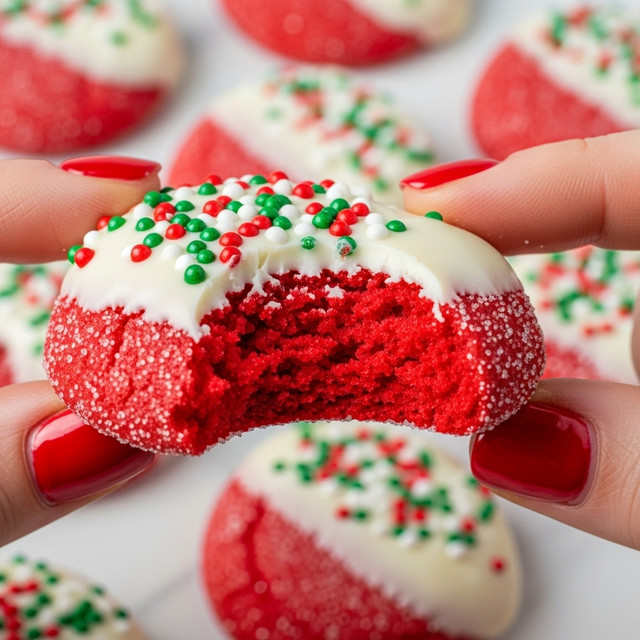
These Snow-Capped Red Velvet Sugar Cookies combine the tender crumb of classic red velvet with a sweet white chocolate topping. They’re perfect for festive occasions or any time you want a colorful, delicious treat. The touch of cocoa and the snowy white chocolate cap make these cookies truly special.
Ingredients
- 1/2 cup (1 stick) unsalted butter, room temperature (113g)
- 2/3 cup granulated sugar (133g)
- 1/3 cup packed light brown sugar (66g)
- 1 large egg, room temperature (56g)
- 1 tsp vanilla extract (5g)
- 1 tsp red gel food coloring
- 2 cups + 2 Tbsp all-purpose flour (270g)
- 1 Tbsp unsweetened baking cocoa, sifted if lumpy (6g)
- 1 tsp baking soda (6g)
- 1/4 tsp fine salt (2g)
- 1/4 cup granulated sugar for rolling – optional (50g)
- 1 cup good quality white chocolate chips or chopped white chocolate, melted (175g)
- 1 Tbsp Christmas nonpareil sprinkles – optional
Instructions
- Step 1: Preheat the oven to 350°F (175°C). Line two large baking sheets with parchment paper or silicone baking mats, then set aside.
- Step 2: In a large bowl, beat together the unsalted butter, granulated sugar, and light brown sugar using an electric hand mixer or stand mixer with a paddle attachment. Mix on medium-high speed until the mixture lightens in color, about 2 minutes.
- Step 3: Add the egg, vanilla extract, and red gel food coloring to the butter and sugar mixture. Mix on medium speed until well combined, scraping down the bowl sides as needed.
- Step 4: In a separate bowl, whisk together the all-purpose flour, cocoa powder, baking soda, and salt. Gradually add the dry ingredients to the wet mixture on low speed until just combined. The dough should be quite thick.
- Step 5: Using a 1 1/2 Tbsp cookie scoop or a large spoon, scoop about 21 balls of cookie dough.
- Step 6: Optional: Roll each dough ball in granulated sugar for a slight crunch. Place the dough balls about 2 inches apart on the prepared baking sheets.
- Step 7: Bake the cookies for about 9 minutes, or until they appear set in the center.
- Step 8: Optional: While still warm, gently press the cookies with the bottom of a metal measuring cup or glass to achieve a chewy center. Let the cookies cool on the baking sheets for 10 minutes, then transfer to a wire rack to cool completely.
- Step 9: Dip about one-third of each cooled cookie into the melted white chocolate, allowing excess to drip off. Scrape the bottom edge on the bowl to avoid pooling.
- Step 10: Place the dipped cookies on parchment paper or silicone mats and let the white chocolate set at room temperature for about 30 minutes. If desired, decorate the edges with nonpareil sprinkles before the chocolate fully sets. Enjoy!
Tips & Variations
- Properly measure your flour by fluffing it, spooning it into the cup, and leveling with a knife to avoid dense cookies.
- Use high-quality white chocolate for a smooth, creamy snow cap that hardens nicely.
- For a deeper red color, add a touch more red gel food coloring.
- Sprinkle festive colored sugars or edible glitter on the white chocolate before it sets for extra holiday flair.
Storage
Store cooled cookies in an airtight container at room temperature for up to 5 days. The white chocolate topping may soften in humid conditions, so keep them in a cool, dry place. To refresh, bring cookies to room temperature before serving—avoid microwaving as this can melt the white chocolate.
How to Serve
Serve this delicious recipe with your favorite sides.
FAQs
Can I make the dough ahead of time?
Yes, the dough can be refrigerated for up to 48 hours before baking. Let it come to room temperature for about 15 minutes before scooping and baking.
What if I don’t have red gel food coloring?
Gel food coloring provides vibrant color without thinning the dough. If you only have liquid food coloring, use it sparingly as it may affect dough consistency and color intensity.
PrintSnow-Capped Red Velvet Sugar Cookies Recipe

These Snow-Capped Red Velvet Sugar Cookies are soft, chewy, and bursting with classic red velvet flavor. Rolled in sugar for a slight crunch and topped with a luscious white chocolate snow cap, they become a festive treat perfect for holiday celebrations or any special occasion.
- Prep Time: 20 minutes
- Cook Time: 9 minutes
- Total Time: 59 minutes
- Yield: About 21 cookies 1x
- Category: Dessert
- Method: Baking
- Cuisine: American
Ingredients
Cookie Dough
- 1/2 cup (1 stick) unsalted butter, room temperature (113g)
- 2/3 cup granulated sugar (133g)
- 1/3 cup packed light brown sugar (66g)
- 1 large egg, room temperature (56g)
- 1 tsp vanilla extract (5g)
- 1 tsp red gel food coloring
- 2 cups + 2 Tbsp all-purpose flour (270g)
- 1 Tbsp unsweetened baking cocoa, sifted if lumpy (6g)
- 1 tsp baking soda (6g)
- 1/4 tsp fine salt (2g)
- 1/4 cup granulated sugar for rolling – optional (50g)
White Chocolate Snow Cap
- 1 cup good quality white chocolate chips or chopped white chocolate, melted (175g)
- 1 Tbsp Christmas nonpareil sprinkles – optional
Instructions
- Preheat and Prepare Baking Sheets: Preheat the oven to 350°F (175°C) and line two large cookie sheets with parchment paper or silicone baking mats to prevent sticking.
- Cream Butter and Sugars: In a large mixing bowl, cream together the unsalted butter, granulated sugar, and light brown sugar using an electric hand mixer or stand mixer fitted with a paddle attachment. Beat on medium-high speed until the mixture is light and fluffy, about 2 minutes.
- Add Egg, Vanilla, and Food Coloring: Mix in the egg, vanilla extract, and red gel food coloring on medium speed until combined. Scrape the sides and bottom of the bowl with a rubber spatula to ensure everything is well incorporated.
- Add Dry Ingredients: Gradually add the all-purpose flour, unsweetened cocoa powder, baking soda, and salt to the wet ingredients on low speed. Mix just until combined; the dough should be thick and hold together well.
- Scoop Dough Balls: Using a 1 1/2 Tbsp cookie scoop or a large spoon, portion out about 21 dough balls. Roll each ball in granulated sugar if desired for a slight crunch on the outside.
- Arrange and Bake: Place the sugar-coated dough balls about 2 inches apart on the prepared baking sheets. Bake in the preheated oven for approximately 9 minutes, or until the cookies appear set in the center.
- Optional Flattening: While still warm, gently press each cookie with the bottom of a metal measuring cup or glass to flatten slightly for chewier centers. This step is optional.
- Cool Cookies: Let the cookies cool on the baking sheet for 10 minutes before transferring them to a wire rack to cool completely.
- Prepare White Chocolate: Melt the white chocolate chips or chopped white chocolate until smooth.
- Dip Cookies: Dip about one-third of each cooled cookie into the melted white chocolate. Allow any excess chocolate to drip off, then scrape the bottom edge against the bowl to avoid pooling.
- Decorate and Set: Place the dipped cookies on parchment paper or silicone mats to let the white chocolate set at room temperature for about 30 minutes. Optionally, add Christmas nonpareil sprinkles along the edge of the white chocolate before it sets.
- Serve and Enjoy: Once the white chocolate is firm, your festive Snow-Capped Red Velvet Sugar Cookies are ready to be enjoyed!
Notes
- For best results, measure flour properly by fluffing, spooning into the measuring cup, and leveling with a knife to avoid using too much flour.
- Use room temperature ingredients to ensure even mixing and better texture.
- Rolling the dough balls in sugar before baking adds a delicate crunch to the cookie exterior but can be omitted.
- Pressing the cookies while warm gives a chewier center, which is optional based on preference.
- Use good quality white chocolate for the snow cap to ensure smooth melting and a delicious finish.
- Store cookies in an airtight container at room temperature for up to 5 days.
- For faster setting of the white chocolate, you may refrigerate the cookies after dipping, but avoid condensation by bringing back to room temperature before serving.
Keywords: red velvet cookies, sugar cookies, white chocolate cookies, holiday cookies, festive cookies, chewy cookies, red velvet dessert