Mini Valentine Cheesecakes Recipe
Introduction
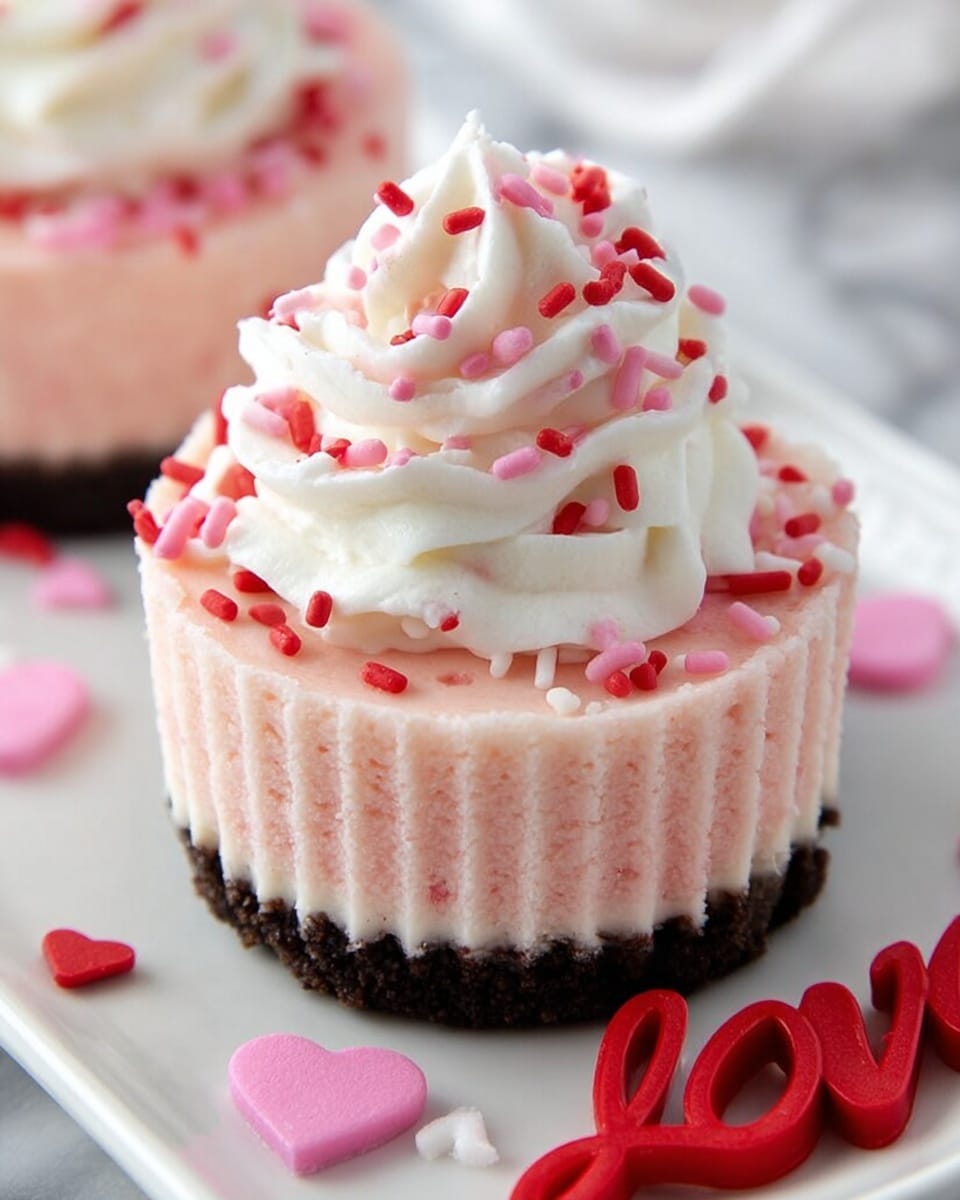
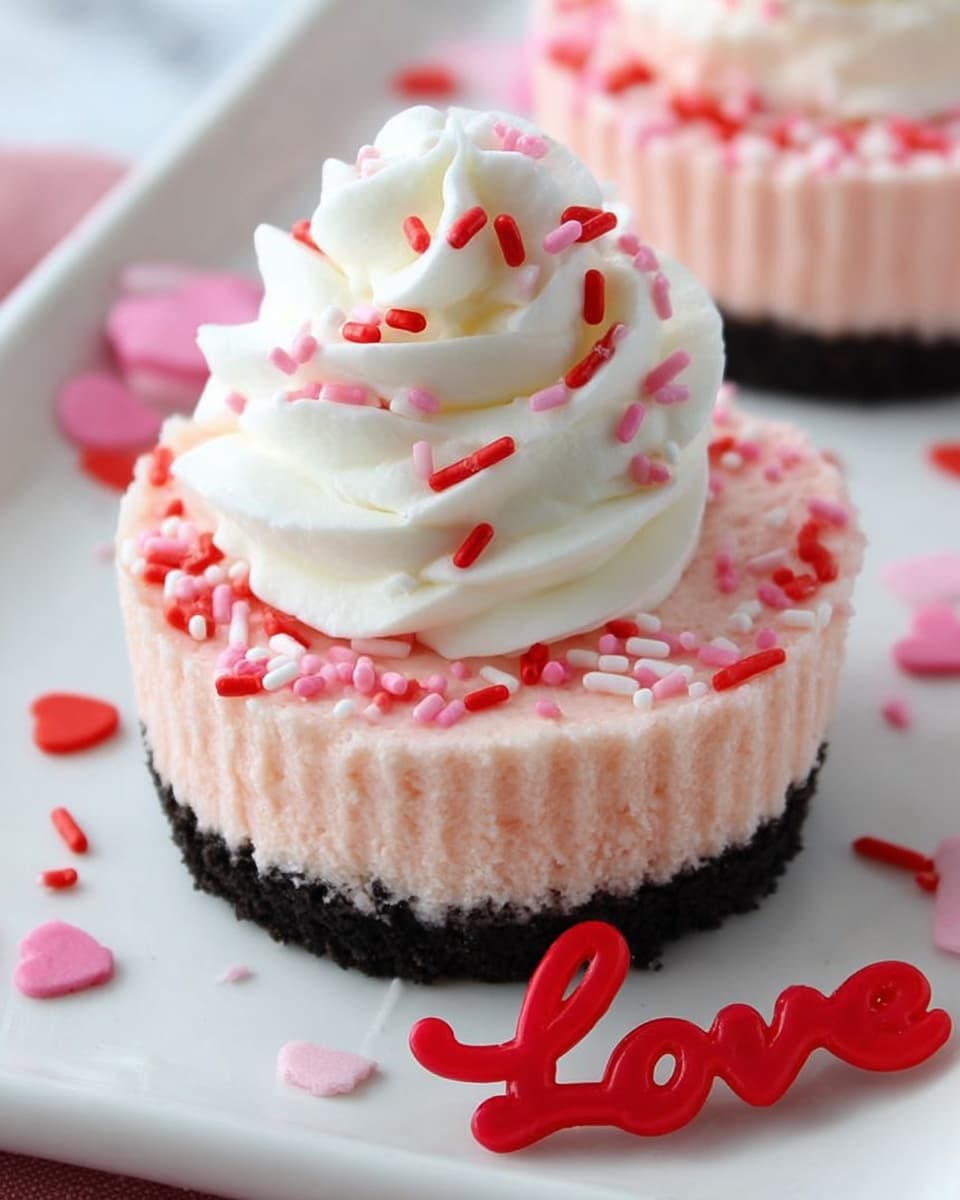
These Mini Valentine Cheesecakes are the perfect sweet treat to share on a special day. Creamy, colorful, and bite-sized, they combine a crunchy Oreo crust with a smooth, pink cheesecake filling. They’re easy to make and sure to impress your loved ones.
Ingredients
- 2 (8 oz) cream cheese, softened
- 1/2 cup sugar
- 2 eggs
- 1 tsp vanilla extract
- Red food coloring
- Whipped cream (optional)
- Valentine sprinkles (optional)
- 1 cup Oreo crumbs
- 2 1/2 tbsp butter, melted
Instructions
- Step 1: Preheat your oven to 350 degrees Fahrenheit and line a cupcake pan with paper liners.
- Step 2: Pulse about 10 to 11 Oreo cookies in a food processor until they become fine crumbs. Add the melted butter and pulse again until the mixture is well combined.
- Step 3: Divide the Oreo crumb mixture evenly into each cupcake liner and press firmly to create the crust.
- Step 4: In a medium bowl, beat the softened cream cheese and sugar together until smooth. Then add the eggs and vanilla extract, mixing well after each addition.
- Step 5: Add red food coloring a little at a time until you reach your desired pink shade.
- Step 6: Spoon about 1/4 cup of the cheesecake mixture into each cupcake liner, filling them evenly over the crust.
- Step 7: Bake for 15 to 17 minutes until the centers are just slightly jiggly. Remove from the oven and let them cool completely in the pan before refrigerating until firm.
- Step 8: If desired, top each cheesecake with whipped cream and Valentine sprinkles before serving.
Tips & Variations
- For extra flavor, add a teaspoon of lemon zest to the cheesecake mixture.
- You can substitute the Oreo crumbs with graham cracker crumbs for a different crust texture.
- Use gel food coloring for a more vibrant pink color without thinning the batter.
- Make these mini cheesecakes a day ahead to allow the flavors to meld and the texture to set perfectly.
Storage
Store the mini cheesecakes in an airtight container in the refrigerator for up to 3 days. Reheat is not recommended as it can affect the texture—serve chilled for the best taste and consistency.
How to Serve
Serve this delicious recipe with your favorite sides.
FAQs
Can I make these mini cheesecakes without a food processor?
Yes, you can place the Oreo cookies in a zip-top bag and crush them with a rolling pin until fine crumbs form. Then mix with melted butter by hand.
How do I know when the cheesecakes are done baking?
The centers should still be slightly jiggly when you gently shake the pan; this ensures they remain creamy once cooled and chilled.
PrintMini Valentine Cheesecakes Recipe

These Mini Valentine Cheesecakes are a perfect festive dessert for celebrating love. Featuring a creamy, smooth pink cheesecake filling on a buttery Oreo crumb crust, these bite-sized treats are baked to perfection and topped with whipped cream and sprinkles for a fun, romantic touch.
- Prep Time: 15 minutes
- Cook Time: 17 minutes
- Total Time: 2 hours 30 minutes (including chilling time)
- Yield: 12 mini cheesecakes 1x
- Category: Dessert
- Method: Baking
- Cuisine: American
Ingredients
Crust
- 1 cup Oreo crumbs (about 10–11 Oreo cookies)
- 2 1/2 tbsp Butter, melted
Cheesecake Filling
- 2 (8 oz) packages Cream Cheese, softened
- 1/2 cup Sugar
- 2 Eggs
- 1 tsp Vanilla Extract
- Red Food Coloring (enough to reach desired pink color)
Toppings (Optional)
- Whipped Cream
- Valentine Sprinkles
Instructions
- Prepare the oven and pan: Preheat your oven to 350°F (175°C). Line a cupcake pan with paper liners to make removing the mini cheesecakes easy and to keep their shape.
- Make the crust: Pulse about 10 to 11 Oreo cookies in a food processor until they become fine crumbs. Add the melted butter and pulse again until the mixture is well combined and looks like wet sand.
- Form crust base: Evenly divide the Oreo crumb mixture among the cupcake liners. Press the crumbs firmly into the bottom of each liner to create a solid crust layer.
- Prepare filling: In a medium-sized bowl, beat the softened cream cheese with sugar until smooth and creamy. Add the eggs one at a time along with the vanilla extract, beating well after each addition.
- Add color: Mix in red food coloring gradually until you reach your preferred pink shade for a festive Valentine’s look.
- Fill cupcake liners: Spoon about 1/4 cup of the cheesecake mixture into each cupcake liner, filling them evenly over the Oreo crust.
- Bake: Bake the mini cheesecakes in the preheated oven for 15 to 17 minutes. The centers should still be slightly jiggly when done.
- Cool and chill: Remove the pan from the oven and let the cheesecakes cool completely in the pan. Once cooled, refrigerate them until firm, preferably for a few hours or overnight.
- Add toppings: Before serving, top each mini cheesecake with whipped cream and Valentine-themed sprinkles if desired for an extra festive touch.
Notes
- Make sure the cream cheese is fully softened to avoid lumps in the batter.
- The slightly jiggly center means the cheesecake is perfectly baked and will firm up as it chills.
- You can substitute Oreo crumbs with graham cracker crumbs if preferred.
- Store cheesecakes in the refrigerator and consume within 3-4 days for best freshness.
- For extra flavor, you can add a teaspoon of lemon juice or zest to the filling.
Keywords: mini cheesecakes, valentine dessert, oreo crust, pink cheesecake, holiday dessert, bite-size desserts