Snowball Cake Recipe
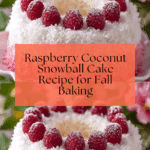
If you’re on the hunt for a dessert that’s as delightful to look at as it is to eat, the Snowball Cake is exactly what you need. This charming raspberry coconut dessert combines tender, buttery cake layered with luscious raspberry preserves and a snowy blanket of shredded coconut that makes every bite feel like a celebration. Whether you’re entertaining guests or treating yourself, the Snowball Cake offers a perfect balance of sweet fruitiness and tropical texture, making it an irresistible choice for any occasion.

Ingredients You’ll Need
Getting started with Snowball Cake is a breeze because it relies on simple, well-loved ingredients that come together beautifully. Each component plays an important role—flour and baking powder create the perfect rise and crumb, butter adds rich flavor and moisture, and raspberry preserves bring in that bright, fruity surprise that pairs perfectly with coconut.
- All-purpose flour: The foundation of your cake’s tender crumb; using fresh flour ensures a soft texture.
- Baking powder: Helps the cake rise just right for a light, fluffy bite.
- Salt: Enhances all the flavors without being noticeable on its own.
- Unsalted butter: Room temperature butter blends seamlessly for a smooth cake batter.
- Granulated sugar: Sweetens the cake perfectly without overpowering the other ingredients.
- Large eggs: Bind everything together and add richness.
- Vanilla extract: Adds warmth and depth to the flavor profile.
- Whole milk: Keeps the cake moist and tender.
- Raspberry preserves: Slightly warmed to swirl easily; these give the cake its signature fruity note.
- Sweetened shredded coconut: Creates the snowy coating that gives the Snowball Cake its name and adds tropical flair.
- Powdered sugar (optional): A delicate dusting for an extra touch of sweetness and beauty.
How to Make Snowball Cake
Step 1: Prepare Your Pan and Oven
Begin by preheating your oven to 350°F (175°C) so it’s at the perfect temperature when you’re ready to bake. Grease a 10-cup dome-shaped oven-safe pan or bowl thoroughly, then dust it lightly with flour. This step ensures your cake will release easily once baked, preserving that stunning dome shape that makes Snowball Cake so special.
Step 2: Mix the Dry Ingredients
In a medium bowl, whisk together the all-purpose flour, baking powder, and salt. This helps distribute the leavening agent evenly throughout the batter so the cake rises beautifully and has a consistent texture.
Step 3: Cream Butter and Sugar
Using a separate bowl, beat the unsalted butter and granulated sugar until light and fluffy—about 3 to 5 minutes. This step adds air to the batter, which results in a tender, airy cake. Then, add eggs one at a time, mixing well after each addition to fully incorporate them and build structure.
Step 4: Add Vanilla and Alternate Dry Ingredients with Milk
Stir in the vanilla extract for that irresistible aroma, then begin adding the dry ingredients alternately with the milk. Start and end with the flour mixture, mixing gently until just combined. Overmixing here can lead to a denser cake, so be gentle for the perfect Snowball Cake texture.
Step 5: Layer Batter and Raspberry Preserves
Pour half of the batter into your prepared pan, smoothing it out evenly. Dollop the slightly warmed raspberry preserves over the batter. This juicy layer creates beautiful pockets of fruity flavor when baked. Top with the remaining batter, then swirl gently using a knife or skewer to create a marbled effect—this is what gives the cake that signature burst of raspberry sweetness inside.
Step 6: Bake and Cool
Bake your cake for 45 to 55 minutes, or until a toothpick inserted into the center comes out clean. Once out of the oven, let the cake cool inside the pan for 10 minutes. Then carefully turn it out onto a wire rack to cool completely—letting it cool fully is key before adding the coconut coating.
Step 7: Coat with Coconut and Finish
Lightly brush the cooled cake with water or a simple syrup to give the shredded coconut something to stick to. Press the sweetened shredded coconut all over the cake until it’s fully coated, resembling a fluffy snowball. For an extra touch of elegance and sweetness, dust the Snowball Cake lightly with powdered sugar before slicing.
How to Serve Snowball Cake

Garnishes
Snowball Cake looks stunning on its own, but adding fresh raspberries or a few mint leaves can elevate its presentation. A dollop of whipped cream on the side also pairs beautifully, enhancing the fruity-coconut harmony while providing a creamy contrast in every bite.
Side Dishes
Serve this cake with light accompaniments such as a cup of chamomile or green tea to balance its sweetness. Alternatively, a scoop of vanilla ice cream harmonizes with the tropical and raspberry notes, turning the dessert into a decadent treat perfect for after-dinner indulgence.
Creative Ways to Present
Try slicing the Snowball Cake into bite-sized cubes and serving them on pretty toothpicks as charming finger food at parties. You can also layer slices with fresh berries and whipped cream in clear glasses for an elegant trifle-style presentation that’s sure to impress your guests.
Make Ahead and Storage
Storing Leftovers
Leftover Snowball Cake can be stored tightly wrapped in plastic wrap or kept in an airtight container at room temperature for up to 2 days. For longer freshness, keep it in the refrigerator, but allow it to come to room temperature before serving to soften the coconut coating and bring out the flavors.
Freezing
If you want to save your Snowball Cake for later, freezing works wonderfully. Wrap the cooled cake tightly in plastic wrap and then aluminum foil to prevent freezer burn. Freeze for up to 2 months. When ready to enjoy, thaw in the refrigerator overnight, then warm to room temperature for the best texture.
Reheating
Snowball Cake is best eaten at room temperature, but if you’d like it slightly warm, place slices in a preheated 300°F (150°C) oven for 5 to 7 minutes. Avoid microwaving as this can make the coconut coating a bit chewy. Gentle warming revives the cake’s softness without sacrificing its delightful texture.
FAQs
Can I use frozen raspberries instead of raspberry preserves for the Snowball Cake?
While fresh or frozen raspberries are delicious, for this recipe the preserves provide the perfect level of sweetness and a smooth texture that spreads easily within the batter. Using frozen raspberries could add unwanted moisture and not create the same swirled effect.
Is it necessary to use sweetened coconut, or can I use unsweetened?
Sweetened shredded coconut creates that traditional snowy sweetness and chewy texture. Using unsweetened coconut will give a less sweet, slightly drier finish, so it’s best to stick with sweetened for the classic Snowball Cake experience.
Can I make this cake gluten-free?
Yes! To make a gluten-free Snowball Cake, substitute the all-purpose flour for a gluten-free baking blend that includes xanthan gum. Keep baking powder and the rest of the ingredients the same, but watch baking time as some blends bake faster.
What type of pan works best for baking Snowball Cake?
The traditional Snowball Cake is baked in a domed oven-safe bowl or bundt pan to give it that perfect round shape. If you don’t have one, a small bundt pan or even an oven-safe mixing bowl works wonderfully as long as it’s about 10 cups in volume.
Why swirl the raspberry preserves instead of mixing it fully into the batter?
Swirling the preserves creates visual interest and delicious pockets of sweet, tart raspberry flavor throughout the cake without overwhelming the overall texture. It also prevents the preserves from sinking to the bottom during baking, giving the Snowball Cake its signature charm.
Final Thoughts
Snowball Cake is truly a crowd-pleaser – a dessert that brings a smile with every bite thanks to its perfect balance of textures, flavors, and a charming appearance. I encourage you to give this recipe a try; it’s easier than you might think and guarantees a beautiful outcome that looks like it took hours to make. Once you experience the magic of this raspberry coconut dessert, Snowball Cake is bound to become one of your favorite treats to share with friends and family.
PrintSnowball Cake Recipe
This Snowball Cake is a delightful raspberry coconut dessert featuring a moist vanilla cake swirled with sweet raspberry preserves and coated in shredded coconut. Its unique dome shape and irresistible flavor make it perfect for special occasions or a cozy treat.
- Prep Time: 20 minutes
- Cook Time: 50 minutes
- Total Time: 1 hour 10 minutes
- Yield: 10 servings 1x
- Category: Dessert
- Method: Baking
- Cuisine: American
- Diet: Vegetarian
Ingredients
Dry Ingredients
- 2½ cups all-purpose flour
- 1½ teaspoons baking powder
- ½ teaspoon salt
Wet Ingredients
- ¾ cup unsalted butter, room temperature
- 1½ cups granulated sugar
- 3 large eggs
- 1 tablespoon vanilla extract
- 1 cup whole milk
Filling and Topping
- ½ cup raspberry preserves (slightly warmed)
- 2 cups sweetened shredded coconut
- Powdered sugar (optional, for dusting)
Instructions
- Preheat and Prepare Pan: Preheat your oven to 350°F (175°C) and grease a 10-cup oven-safe dome pan or bowl. Dust it lightly with flour to prevent sticking.
- Mix Dry Ingredients: In a medium bowl, whisk together the all-purpose flour, baking powder, and salt. Set aside for later use.
- Cream Butter and Sugar: In a separate large bowl, cream the unsalted butter and granulated sugar together until the mixture is light and fluffy. This will help create a tender texture in your cake.
- Add Eggs and Vanilla: Beat in the eggs one at a time to the creamed butter and sugar, mixing well after each addition. Then add the vanilla extract and combine thoroughly.
- Combine Dry and Wet Ingredients: Alternately add the dry ingredient mixture and whole milk to the butter mixture, starting and ending with the dry ingredients. Mix just until combined to avoid overworking the batter.
- Assemble Cake: Pour half of the batter into the prepared dome pan. Spoon dollops of the slightly warmed raspberry preserves over the batter. Carefully spoon the remaining batter on top. Use a knife or skewer to gently swirl the raspberry preserves into the batter for a marbled effect.
- Bake: Place the pan in the preheated oven and bake for 45 to 55 minutes, or until a toothpick inserted into the center comes out clean.
- Cool: Allow the cake to cool in the pan for about 10 minutes before inverting it onto a wire rack. Let it cool completely to room temperature.
- Coat with Coconut: Lightly brush the cooled cake with water or syrup to help the sweetened shredded coconut adhere. Press the coconut all over the cake evenly to achieve the snowball appearance.
- Finish and Serve: Optionally, dust the top of the cake with powdered sugar for a snowy effect. Slice into wedges and enjoy this delicious raspberry coconut treat!
Notes
- Ensure the raspberry preserves are slightly warmed for easy swirling in the batter.
- If you don’t have a dome pan, use a large oven-safe bowl with a similar capacity.
- Press the shredded coconut gently but firmly to ensure it sticks well to the cake surface.
- For a less sweet option, use unsweetened shredded coconut, but balance the sweetness in the cake batter accordingly.
- Store the cake covered at room temperature for up to 2 days or refrigerate for up to 5 days.
Nutrition
- Serving Size: 1 slice (approx. 1/10th of cake)
- Calories: 370 kcal
- Sugar: 28 g
- Sodium: 150 mg
- Fat: 17 g
- Saturated Fat: 10 g
- Unsaturated Fat: 6 g
- Trans Fat: 0.3 g
- Carbohydrates: 48 g
- Fiber: 2 g
- Protein: 5 g
- Cholesterol: 85 mg
Keywords: snowball cake, raspberry coconut cake, dome cake, raspberry preserves recipe, coconut dessert, baked cake, sweet dessert, summer cake


