
Bunny Oreo Balls Recipe
Introduction
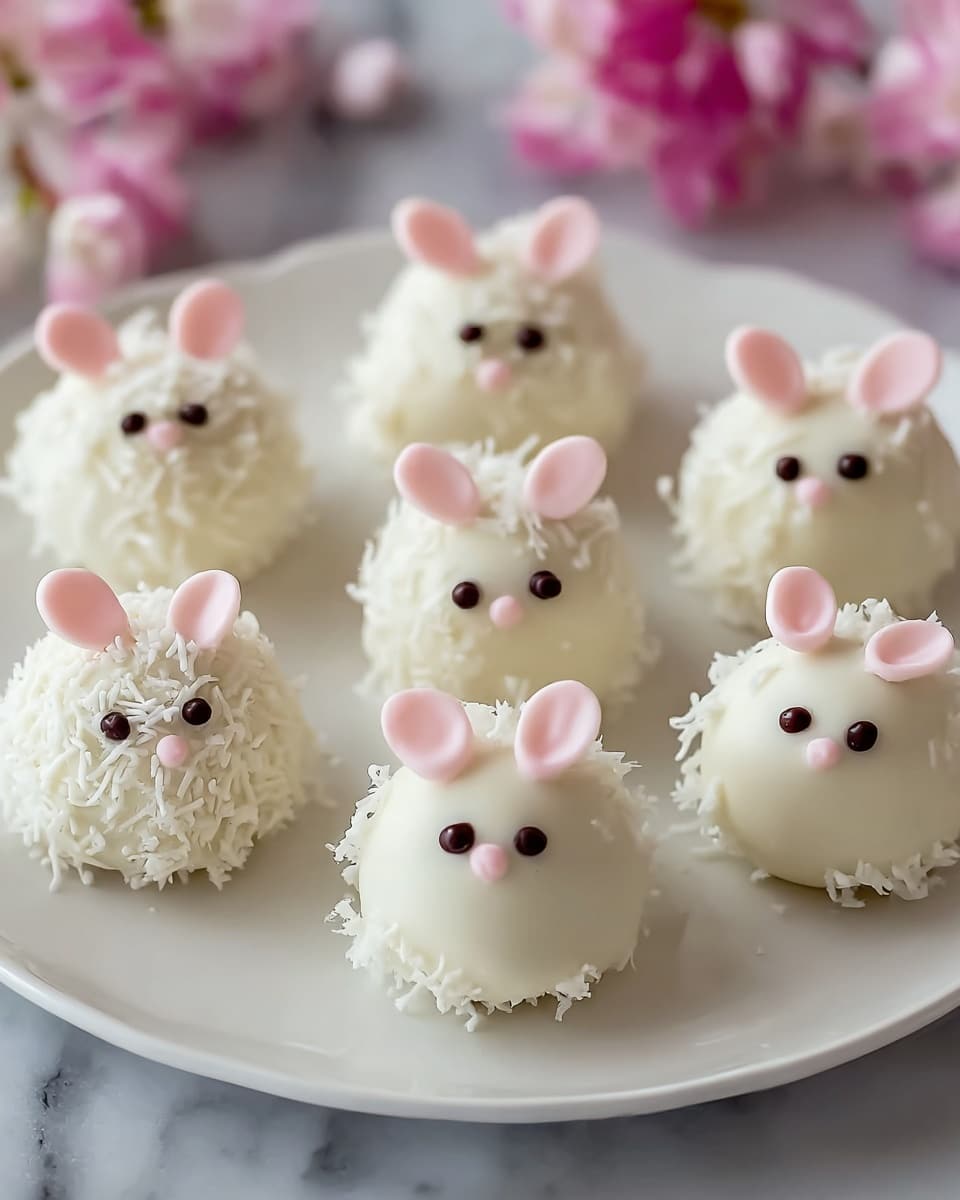
Bunny Oreo Balls are a delightful and adorable treat perfect for springtime or any festive occasion. These bite-sized sweets combine the rich flavor of Oreos with creamy cheesecake and white chocolate, decorated to look like cute little bunnies. They’re fun to make and irresistible to eat!
Ingredients
- 1 package (14.3 oz) Oreo cookies
- 8 oz cream cheese, softened
- 12 oz white chocolate or candy melts
- 1/2 cup pink candy melts
- 1/2 cup black candy melts
- Mini marshmallows (for bunny ears)
- Pink sugar sprinkles (optional for decoration)
- Edible food marker (black for facial details)
Instructions
- Step 1: Crush the Oreo cookies into fine crumbs using a food processor or by placing them in a sealed plastic bag and crushing with a rolling pin. In a mixing bowl, combine the crushed Oreos with the softened cream cheese and mix until fully incorporated and a dough-like consistency forms.
- Step 2: Roll the mixture into small balls, about 1-inch in diameter. Place them on a parchment-lined baking sheet and refrigerate for about 30 minutes to firm up.
- Step 3: Melt the white chocolate or candy melts in a microwave-safe bowl, stirring at 20-second intervals until smooth. Using a fork or dipping tool, dip each Oreo ball into the melted chocolate to coat evenly. Place them back on the parchment paper and let the coating set.
- Step 4: Cut mini marshmallows diagonally to create bunny ears. Dip the sticky side into pink sugar sprinkles, then attach the ears to the Oreo balls while the chocolate coating is still slightly wet.
- Step 5: Melt the pink and black candy melts separately. Use a piping bag or toothpick to add the bunny’s nose and whiskers with the melted candy. Use an edible food marker or melted black chocolate to draw the eyes.
- Step 6: Allow all decorations to set completely before serving.
Tips & Variations
- For a festive twist, try using pastel-colored candy melts instead of white chocolate to match seasonal themes.
- If you don’t have mini marshmallows, almond slivers or small candy pieces can work for bunny ears.
- Make sure your cream cheese is softened to room temperature for easier mixing and smoother texture.
Storage
Store the Bunny Oreo Balls in an airtight container in the refrigerator for up to 5 days. If desired, let them come to room temperature for a few minutes before serving to enhance the flavor and texture. Avoid freezing, as it may affect the coating and cream cheese filling.
How to Serve

Serve this delicious recipe with your favorite sides.
FAQs
Can I use regular chocolate instead of candy melts?
Yes, you can use regular white chocolate or colored chocolate, but candy melts are easier to work with because they melt smoothly and harden with a nice glossy finish.
How do I prevent the Oreo balls from cracking when coating them?
Make sure the Oreo balls are firm and well-chilled before dipping. Also, avoid overheating the chocolate to prevent it from becoming grainy or too thin.
PrintBunny Oreo Balls Recipe

Delightfully cute and delicious Bunny Oreo Balls made by combining crushed Oreo cookies and cream cheese, coated in smooth white chocolate, and decorated to resemble adorable bunnies with marshmallow ears and candy details. A perfect no-bake treat for Easter or any festive occasion.
- Prep Time: 20 minutes
- Cook Time: 0 minutes
- Total Time: 50 minutes
- Yield: Approximately 24 Oreo balls 1x
- Category: Dessert
- Method: No-Cook
- Cuisine: American
Ingredients
Oreo Mixture
- 1 package (14.3 oz) Oreo cookies
- 8 oz cream cheese, softened
Coating and Decoration
- 12 oz white chocolate or candy melts
- 1/2 cup pink candy melts
- 1/2 cup black candy melts
- Mini marshmallows (for bunny ears)
- Pink sugar sprinkles (optional for decoration)
- Edible food marker (black for facial details)
Instructions
- Prepare the Oreo Mixture: Crush the Oreo cookies into fine crumbs using a food processor or by placing them in a sealed plastic bag and crushing with a rolling pin. In a mixing bowl, combine the crushed Oreos with softened cream cheese. Mix until fully incorporated and a dough-like consistency forms.
- Shape the Balls: Roll the mixture into small balls, about 1-inch in diameter. Place them on a parchment-lined baking sheet and refrigerate for about 30 minutes to firm up.
- Coat with Chocolate: Melt the white chocolate or candy melts in a microwave-safe bowl, stirring in 20-second intervals until smooth. Using a fork or dipping tool, dip each Oreo ball into the melted chocolate, ensuring even coating. Place them back on the parchment paper and allow the coating to set.
- Decorate as Bunnies: Cut mini marshmallows diagonally and dip the sticky side into pink sugar sprinkles to create bunny ears. Attach the ears to the Oreo balls while the chocolate is still slightly wet. Melt the pink and black candy melts separately, then use a piping bag or toothpick to create the bunny’s nose and whiskers. Use an edible food marker to draw the eyes or pipe them with melted black chocolate.
- Final Touches: Let the decorations set completely before serving. Store in an airtight container in the refrigerator for up to 5 days.
Notes
- Ensure cream cheese is softened for easier mixing.
- Use parchment paper to prevent sticking during chilling and coating.
- Work quickly when attaching ears so they stick properly to the chocolate coating.
- Store finished Bunny Oreo Balls refrigerated to keep fresh up to 5 days.
- Customize decorations with other colored candy melts for different themes or celebrations.
Keywords: Oreo balls, Bunny Oreo Balls, Easter dessert, no-bake Oreo recipe, chocolate coated Oreo balls, festive treats
![Blueberry Rice Krispies [15 Minutes] Recipe](https://nayabaker.com/wp-content/uploads/2025/09/0_2-1757364292363-768x768.webp)