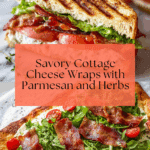
Cottage Cheese Wraps Recipe
If you’re craving a light yet satisfying dish that bursts with flavor and texture, these Cottage Cheese Wraps are about to become your new kitchen best friend. Soft, cheesy, and delicately seasoned, these wraps offer a wonderfully versatile base to hold all your favorite fillings, making each bite a delight. Whether you need a quick lunch, a protein-packed snack, or a creative appetizer, this recipe brings together simple ingredients in an effortlessly delicious way that feels both fresh and comforting.

Ingredients You’ll Need
Every ingredient in this recipe plays a starring role, creating a blend of creamy, cheesy richness and savory herbs that make these wraps irresistible. The simplicity of the components belies the depth of flavor, and the textures work harmoniously to give you wraps that are both tender and sturdy enough to hold your fillings with ease.
- Full-fat cottage cheese (1 cup): This adds creaminess and protein, making the wraps rich and satisfying without heaviness.
- Large eggs (2): Eggs provide structure and bind all the ingredients together into a perfect wrap batter.
- Grated Parmesan cheese (4 tbsp): Parmesan imparts a sharp, nutty flavor that elevates the wraps’ taste complexity beautifully.
- Garlic powder (1 tsp): Garlic powder introduces a warm, aromatic undertone that complements the cheese perfectly.
- Italian seasoning (1 tsp): A fragrant herb mix brings brightness and a touch of earthiness, rounding out the flavor profile.
How to Make Cottage Cheese Wraps
Step 1: Preheat and Prepare Your Baking Tray
Start by preheating your oven to 350°F (175°C). Lining a large baking sheet with parchment paper prevents the wraps from sticking and makes cleanup a breeze. Getting this step right ensures your wraps bake evenly and lift off easily once cooked.
Step 2: Blend the Batter
Combine the cottage cheese, eggs, Parmesan, garlic powder, and Italian seasoning in a blender or food processor. Blend for about a minute until the mix is silky smooth. This smooth texture is key for a wrap that’s tender but sturdy enough to hold fillings without breaking.
Step 3: Spread the Batter Evenly
Pour the batter onto your lined baking tray, then use a silicone spatula to gently spread it into a thin, uniform rectangle. Try to avoid any gaps so the wrap cooks into one cohesive sheet with a perfect thickness — not too thick, not too thin.
Step 4: Bake Until Set and Golden
Pop the tray into the center of your oven and bake for 30 to 35 minutes. The top should look set and lightly golden when done. Ovens vary, so keep an eye on it as it nears the end of baking time to avoid overcooking.
Step 5: Cool and Peel
Once baked, let the wrap cool completely on the tray. This resting time is crucial — it firms up the wrap, making it easier to peel off the parchment without tearing. When cooled, the wrap should lift away effortlessly, ready for you to fill and enjoy.
How to Serve Cottage Cheese Wraps
Garnishes
Adding garnishes to your Cottage Cheese Wraps takes them from simple to stunning. Fresh herbs like chopped dill, basil, or parsley add a lively pop of color and freshness. A sprinkle of chili flakes or cracked black pepper can introduce a subtle kick that elevates every bite. Don’t be shy about a drizzle of olive oil or a smear of pesto for extra decadence.
Side Dishes
Pairing these wraps with crisp salads, vibrant vegetable crudités, or even a refreshing fruit salad brings balance and contrast to your meal. Lightly dressed greens or crunchy pickles complement the creamy wraps beautifully, adding layers of texture and flavor that keep each mouthful exciting and satisfying.
Creative Ways to Present
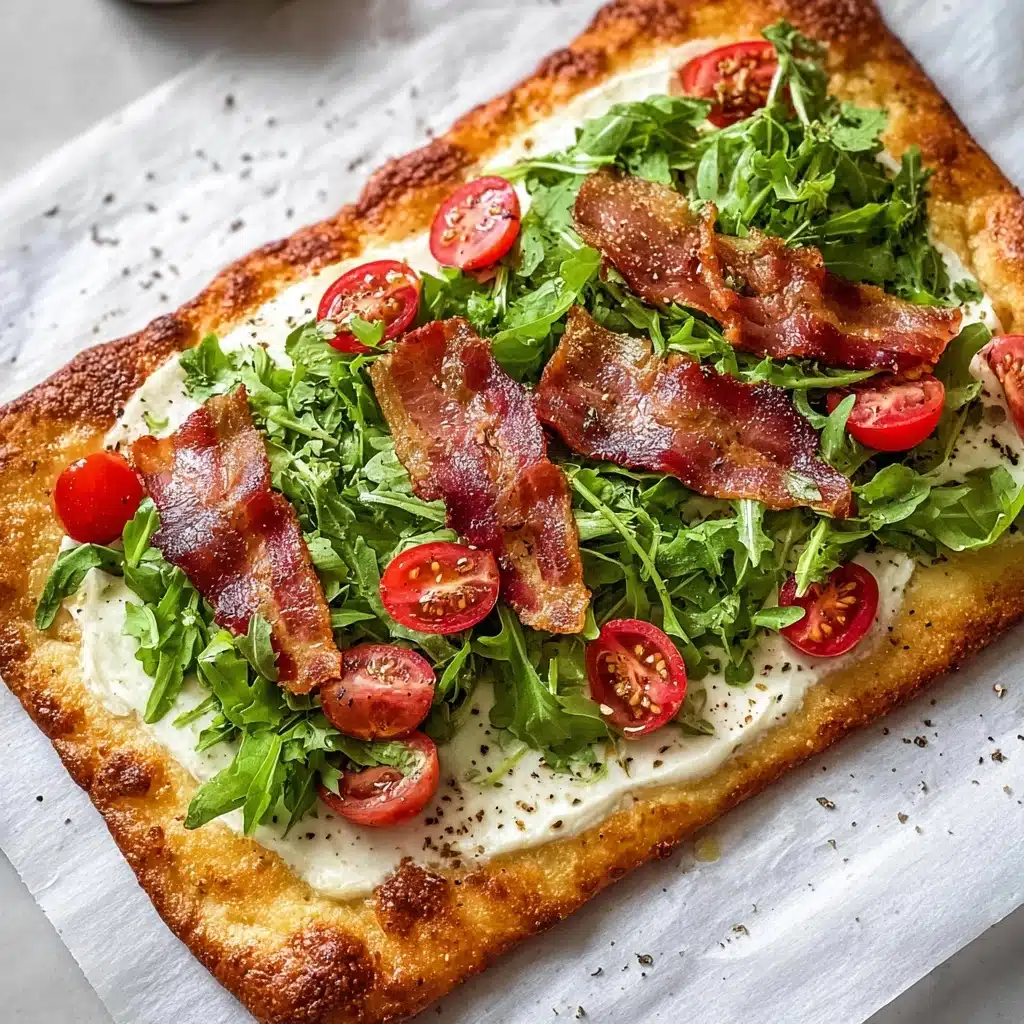
Cottage Cheese Wraps are super approachable and versatile when it comes to presentation. Roll them up tightly with your favorite fillings and slice into bite-sized pinwheels for parties. Or fold them like burritos for an on-the-go lunch. You can even cut them into triangles, arrange on a platter, and let guests customize with assorted dips like hummus, tzatziki, or sun-dried tomato spread.
Make Ahead and Storage
Storing Leftovers
If you find yourself with leftover wrap, simply store it in an airtight container in the refrigerator. It keeps well for up to 3 days, making it an easy option to whip out when you crave a quick, protein-packed snack or meal base. Just be sure to layer it between parchment or wax paper to prevent sticking.
Freezing
You can freeze cooked Cottage Cheese Wraps, but it’s best to separate them with parchment paper before wrapping tightly in plastic wrap or foil. For optimal texture, freeze up to 2 months and thaw overnight in the fridge; however, freezing may slightly soften the texture, so they’re ideal for reheating as wraps or layering in a casserole.
Reheating
Reheat your wrap gently in a preheated oven at 300°F (150°C) for about 10 minutes to restore some crispness, or warm in the microwave for a quick option—just be mindful it might become slightly softer. Adding fresh garnish after reheating helps revive freshness and flavor.
FAQs
Can I use low-fat cottage cheese for these wraps?
Yes, you can substitute low-fat cottage cheese, but keep in mind this may affect the creaminess and richness of your wraps slightly. Full-fat cottage cheese delivers the best texture and flavor balance.
What fillings work best for Cottage Cheese Wraps?
The wraps are incredibly versatile! Think savory fillings like grilled chicken with avocado, smoked salmon with cream cheese, or sautéed mushrooms with caramelized onions. Even fresh veggies with a flavorful spread make fantastic combinations.
Are these wraps gluten-free?
Absolutely! Since the base contains no flour, Cottage Cheese Wraps are naturally gluten-free, making them a great alternative for those avoiding gluten but still craving a wrap-style meal.
Can I make these wraps vegan?
Because the recipe relies on dairy and eggs for structure and taste, it’s tricky to make them fully vegan. However, experimenting with plant-based cheeses and egg substitutes may yield interesting variations if you’re up for a creative challenge.
How can I make the wraps crispier?
For crispier edges, try spreading the batter thinner and baking a few extra minutes. Alternatively, once cooled, gently toast the wrap in a dry skillet to add a bit of crunch before filling.
Final Thoughts
There’s something truly satisfying about crafting your own Cottage Cheese Wraps from simple ingredients and then making them your own with delicious fillings. Whether packing them for lunch or serving as a casual dinner, these wraps strike such a perfect balance of flavor, comfort, and nutrition. I can’t wait for you to try them and discover all the amazing ways to enjoy this easy, wholesome dish!
PrintCottage Cheese Wraps Recipe
Cottage Cheese Wraps are a delicious, protein-packed alternative to traditional wraps. Made from a blend of full-fat cottage cheese, eggs, Parmesan cheese, and flavorful seasonings, these wraps bake into a thin, versatile base perfect for stuffing with your favorite fresh or cooked fillings. They are easy to prepare, gluten-free, and perfect for breakfast, lunch, or a light dinner.
- Prep Time: 10 minutes
- Cook Time: 35 minutes
- Total Time: 45 minutes
- Yield: 2 wraps 1x
- Category: Wraps, Light Meals
- Method: Baking
- Cuisine: American
- Diet: Gluten Free
Ingredients
Wrap Batter
- 1 cup full-fat cottage cheese
- 2 large eggs
- 4 tbsp grated Parmesan cheese
- 1 tsp garlic powder
- 1 tsp Italian seasoning
Instructions
- Preheat the oven: Preheat your oven to 350°F (175°C). Line a large baking sheet with parchment paper to prevent the wrap from sticking during baking.
- Prepare the batter: Combine the cottage cheese, eggs, grated Parmesan cheese, garlic powder, and Italian seasoning in a blender or food processor. Blend for about 1 minute until the mixture is silky smooth.
- Spread the batter: Pour the blended mixture onto the prepared baking sheet. Using a silicone spatula, spread it evenly into a thin, uniform rectangle, ensuring there are no gaps in the batter.
- Bake the wrap: Place the baking sheet in the center of the oven and bake for 30 to 35 minutes, or until the top is set and lightly golden. Baking times may vary slightly depending on your oven.
- Cool and remove: Once baked, remove the wrap from the oven and allow it to cool completely on the tray. This cooling step helps the wrap firm up and makes it easier to peel off the parchment paper.
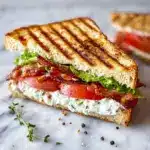
- Slice and fill: Carefully peel the wrap off the parchment paper and cut it into 2 sections. Fill each wrap with your favorite fillings such as cream cheese and bacon, grilled chicken and avocado, roasted peppers with feta, or smoked salmon with dill for a flavorful meal.
Notes
- The wrap batter needs to be spread evenly for best results; too thick and it will not cook thoroughly, too thin and it may break.
- Make sure the wrap cools completely before peeling to prevent tearing.
- Experiment with fillings to suit your taste and dietary preferences.
- The wraps can be stored in the refrigerator wrapped tightly in plastic wrap for up to 2 days.
- Reheat gently in a microwave or skillet before serving if desired.
Nutrition
- Serving Size: 1 wrap (approx. half of recipe)
- Calories: 220
- Sugar: 2g
- Sodium: 430mg
- Fat: 14g
- Saturated Fat: 6g
- Unsaturated Fat: 6g
- Trans Fat: 0g
- Carbohydrates: 4g
- Fiber: 0g
- Protein: 20g
- Cholesterol: 190mg
Keywords: cottage cheese wraps, gluten free wraps, low carb wraps, protein wraps, healthy wraps, keto wraps